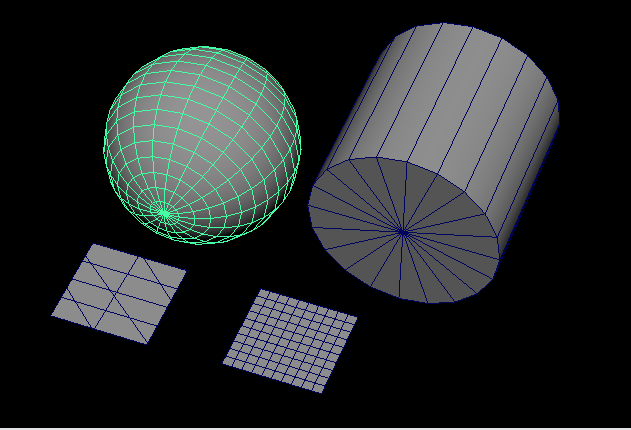
So I stumbled across this post on Reddit from a week ago that asked how to select every n-th face in Maya. There is a way to select every other n-th edge but faces seemed more complicated and it got me thinking in some possibilities.
This is the code I came up with after thinking about it:
from maya import cmds

sel = cmds.ls(orderedSelection=True)
faces_list = cmds.ls(cmds.polyListComponentConversion(sel, toFace=True), flatten=True)
if cmds.objectType(sel[0]) == "transform":
    found_faces_dict = {}
else:
    found_faces_dict = {sel[0]:cmds.ls(cmds.polyListComponentConversion(sel[0], toEdge=True), flatten=True)}

for face in faces_list:
    connected_edges_list = cmds.ls(cmds.polyListComponentConversion(face, toEdge=True), flatten=True)
    if not len(found_faces_dict):
        found_faces_dict[face] = connected_edges_list
        continue
    else:
        match_count = 0
        for found_face in found_faces_dict:
            found_edge_list = found_faces_dict[found_face]
            for fedge in found_edge_list:
                if fedge in connected_edges_list:
                    match_count += 1
        if not match_count:
            found_faces_dict[face] = connected_edges_list

cmds.select(clear=True)
for face in faces_list:
    if face in found_faces_dict:
        cmds.select(face, add=True)
My solution is based on the rule that for a face to be selected it can’t share any immediate edges with previously selected faces. Seems to work well in random shapes I tested!
I used orderedSelection so the first face you select is always included and you have some control over the result. If the whole object is selected then it starts by selecting f[0].
This selects every other face but to select every 2nd or 3rd face in an edge loop or selection of faces I thought I could traverse the topology to find connected faces and skip N like this:
from maya import cmds

every_other = 5 # replace for number of faces to skip

sel = cmds.ls(orderedSelection=True)
faces_list = cmds.ls(cmds.polyListComponentConversion(sel, toFace=True), flatten=True)
faces_list.remove(sel[0])

cmds.select(sel[0])
every_other_count = 0

current_face = sel[0]
count = 0
while len(faces_list) and count < 1000:
    connected_edges_list = cmds.ls(cmds.polyListComponentConversion(current_face, toEdge=True), flatten=True)
    found_face = False
    for edge in connected_edges_list:
        connected_faces = cmds.ls(cmds.polyListComponentConversion(edge, toFace=True), flatten=True)
        for face in connected_faces:
            if face in faces_list:
                faces_list.remove(face)
                current_face = face
                if every_other_count == every_other:
                    every_other_count = 0
                    cmds.select(face, add=True)
                else:
                    every_other_count += 1
                found_face = True
                break
        if found_face:
            found_face = False
            break
    count += 1
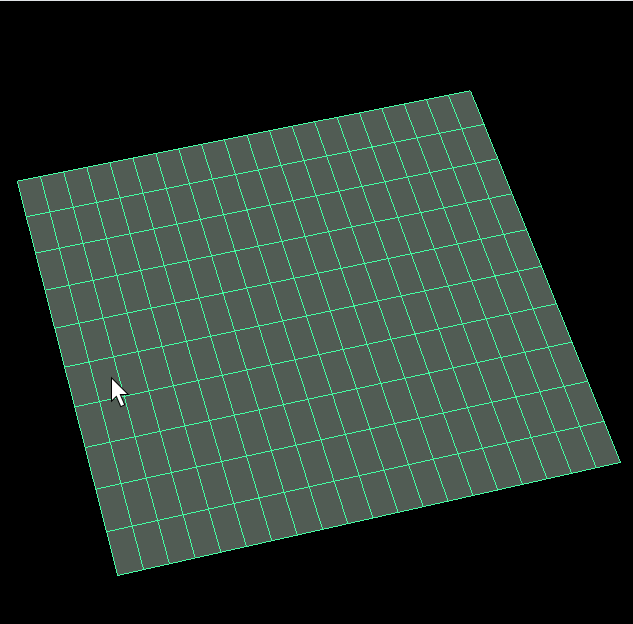
Works as expected when you have a selection that doesn’t loop like in the example above. On cylinders that do a round loop sometimes the traversal goes to the opposite direction. In random selections that have unconnected faces the while loop just never exits so I added a count variable for not hanging Maya forever.
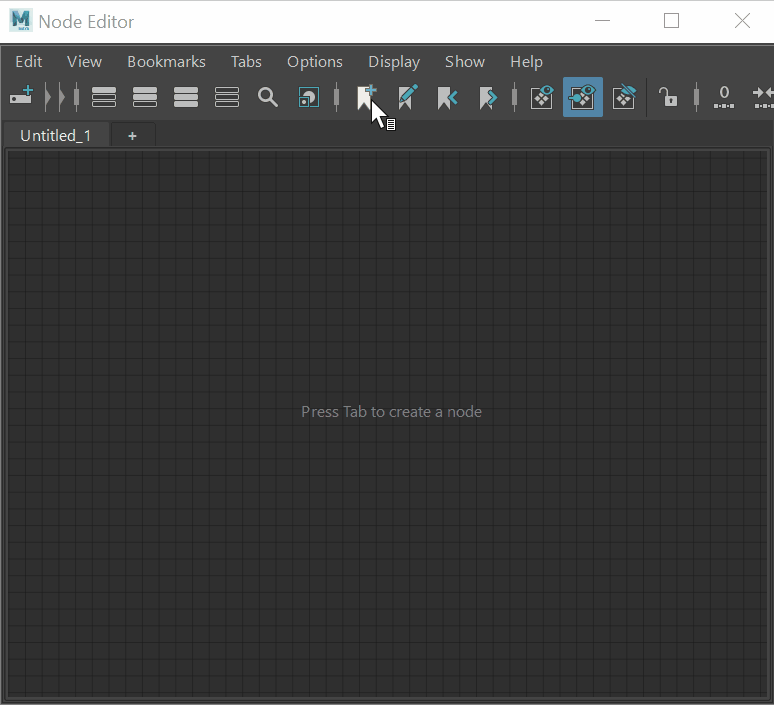
This is a quick overview of the features I use the most in the Node Editor for rigging in Maya and some small tips that might help riggers.
This is not meant to be a Node Editor 101 since you can probably read the official docs to get a better introduction. The screenshots were done in Maya 2019 so your UI may differ if you’re using newer versions.
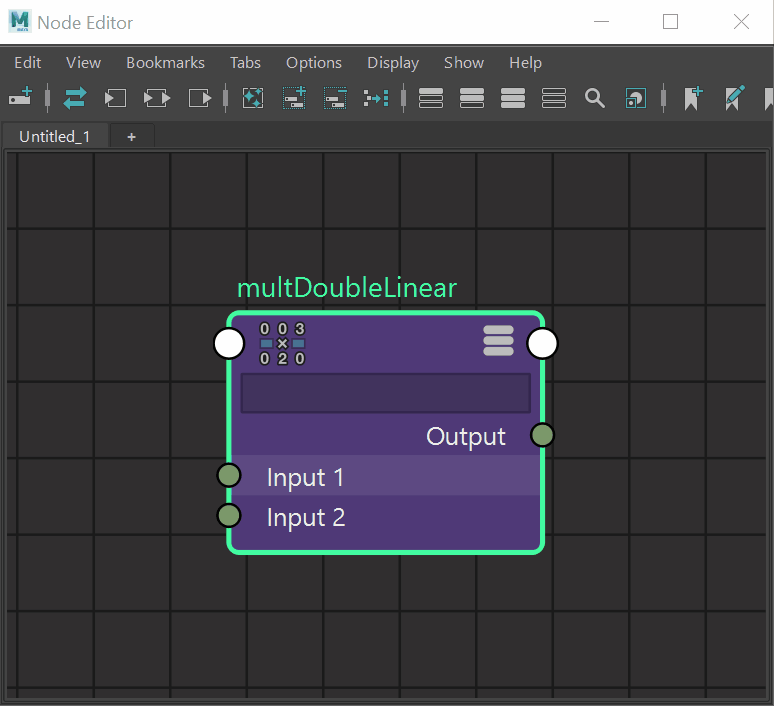
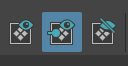
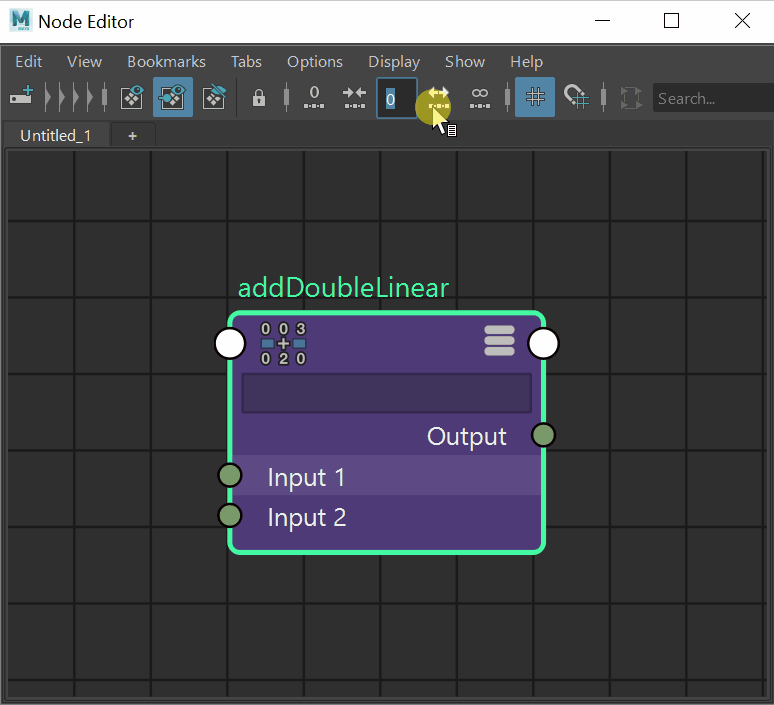
1 – Graph Input/Output connections
Select a node and click these three buttons to replace everything in the graph with the selected node and all its inputs and output.
1st button graphs all INPUTS, basically everything that has an incoming connection to it.
2nd button graphs all INPUTS AND OUTPUTS, basically everything that has an incoming connection to it and all nodes that receive connections from the selected node.
3rd button graphs all OUTPUTS, all nodes that receive connections from the selected node.
As you can see it’s really helpful to understand which nodes are driving what attributes and essential for grasping the flow of your setup. Sometimes the connected graphs can be overwhelming but we can limit how far Maya will show using the Traversal Depth options that is described further below.
2 – Clear/Add/Remove nodes
1st button clears the entire tab, very useful. Can’t be undoable and sometime I click it by mistake ;-(
2nd button adds any nodes that you selected to the graph of the current visible tab.
3rd button removes nodes that you selected from the current visible tab.
Tip: Sometimes I create a new Tab and fill it with nodes I’ll be using frequently so it acts as a quick select set. For instance if you are creating some constraints to the same joints, you can put them in the graph, resize the window to be small, push it to the side, lock the graph so you don’t get new nodes added along the way.
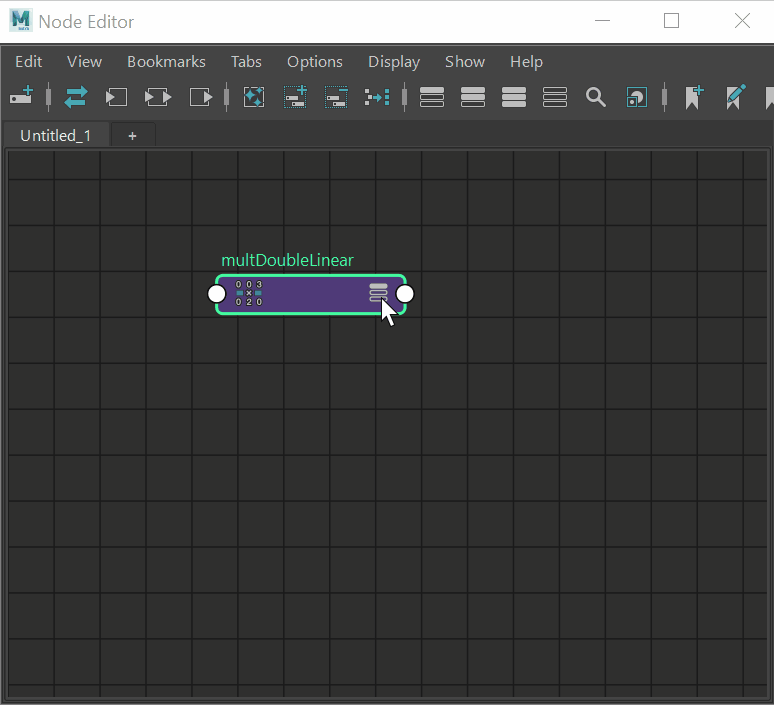
3 – Show attributes
If you have nodes selected, clicking those will toggle how many attributes are showing for these nodes. If nothing is selected, all nodes in the current tab gets updated with the selected mode.
The first three buttons show incrementally more or less attributes. The first one is a compact view (no attributes showing), second one shows connected and most important ones, third button shows most of the attributes of a node, connected or not.
The fourth button shows a custom view of attributes that can be edited for your liking. These settings are per node type (transform, joint, curve, deformer) and gets stored in your Maya preferences (I think). Right-click and hold on top of a node and select “Edit Custom Attribute List” to edit which ones you want to show for the custom view. After you finish click it again to go back to the filtered list.
The default Maya hotkeys for these four buttons are the numbers 1, 2, 3 and 4. Very helpful I definitely use it a lot.
You can also cycle between them per-node clicking on the top-right icon of each node as shown in the gif below:
TIP: if you are looking for a specific attribute that is not showing in any of these views, you can right-click the node and select “Show All Attributes” for a massive list similar to the “Edit Custom Attributes List“. In both these modes there is a input box where you can type in the name of the attribute you’re looking for to make the list smaller.
Personally I don’t really use this at all since it’s a bit cumbersome in the UI (makes the node size huge) and so I prefer to open the Connection Editor since it’s much easier to inspect the attributes there with the scroll bar and filter them as Inputs/Outputs. I also tend to edit the Custom Attributes List to show the ones I usually use and then I rarely have to show everything.
4 – Bookmarks / tabs
Bookmarks, think of them as a snapshot of your graph. Everytime you visit one, it recreates the node view you had once you created it. Once you load a bookmark, whatever nodes are showing in the current graph are overriden by the current bookmark, you can also click the 3rd and 4th buttons to cycle between the existing bookmarks, pretty nice! Note: If you leave a bookmark after modifying it, no nodes you added or removed will be updated unless you open the bookmark editor, right-click and choose “Replace Bookmark” to update an existing bookmark with the current graph.
Tabs are good to temporary editing. Instead of having a single graph showing many many nodes where you need to constantly drag to find things, you can add a tab for each section and only graph the necessary nodes so it’s easier to navigate between them. Tip 1: Ctrl+Tab and Ctrl+Shift+Tab hotkeys can be used to swap between the existing tabs. Tip 2: Double click the tab to rename the it. Can be useful for keeping things tidy.
Important: bookmarks are still better to keep track of your systems since they are persistent. Once you clear the contents of a tab accidentally it cannot be restored so save bookmarks for important graphs you need to revisit later such as limb stretch setups, important distance/angle readers, face setups, etc.
5 – Shapes Display
For rigging I don’t think I ever used the 1st button, I cycle between the 2nd and 3rd.
2nd button will show shapes in the graph, sometimes you need to interact with them
3rd button hides all the shapes. Most of the time you don’t need to see them and it only clutters the graph so you can use this one for a cleaner view
6 – Lock
Clicking it will toggle the locking behavior. Closed Lock Icon doesn’t automatically adds newly created nodes to your graph, Open Lock Icon does. Most of the times I use it open but sometimes I lock it to use the graph as a shortcut to select things I’ll be using frequently.
7 – Traversal Depth
This part is directly related to the first one (graphing input/output connections) and the number inside the box will show the maximum number of connections that can be displayed whenever you click on the Input/Output buttons. -1 is infinite but can be overwhelming when debugging a really complex rig. If you want to slowly dig into the nodes connections, set it to a low value like 2.
The traversal depth limit is particularly useful in really complex and deep node networks. Maya will limit connections to 500 so it doesn’t get too cluttered and slow. When this happens you will get a warning message saying: “// Warning: Node Editor graphing connection limit (500) reached. Partial graph will be displayed. You can modify optionVar ‘editorConnectionScanLimit’ to increase limit. //”
I never really had to go that far to debug connections so the default limit works well. Instead use the depth limit field to do a more accurate search for the nodes and connections you need.
8 – Interactive Node Creation
Lastly if you hover the mouse cursor over the node editor graph and press TAB a small box is shown where you can start writing the name of the type of a node you want to create and it shows all available auto-complete options, pretty handy and everyone wanting to be faster at rigging should make a habit of using it. Remember this is not for selecting named objects in the scene but creating a new node by it’s type – e.g multiplyDivide, plusMinusAverage, reverse and so on;
Final Notes / Ramblings
I never use Pin / Unpin nodes as it always breaks the auto-layout of the nodes for me. Maybe I’m doing it wrong but if I need to keep nodes handy for selecting and interacting I just create a new tab and add them there.
Search field in the far right can be useful but most of the times I only add the nodes I’m interested in to the graph so I never use it. Clicking in “Recent Searches” is broken as of Maya 2022.
Update (02/Sep/22): Niels Kleinheinz pointed out that you can modify the behavior of the Graph Inputs/Outputs to not clear the graph when querying the connections, this makes following a graph much easier. The toggle is named “Additive Graphing Mode” in the Options Menu:
Following on Vasil Shotarov’s awesome tutorial, I’ve scripted a setup to read angles and have been using it a lot lately. Pretty stable and saves me a lot of time!
STEP 1 Run quatTwistReader(“l_wrist”, “x”). Double-check your rig for the desired axis you want to extract but it’s usually X as in the axis that goes along a chain.
STEP 2 Parent constrain the top “l_wrist_twist_reader_grp” (reader_grp variable) result to your hierarchy so the reader is always in the correct orientation. For the wrist it should constrained to the last bendy joint of the forearm, right before the hand.
STEP 3 Orient constrain the hand joint to command the “l_wrist_twist_reader” (reader variable).
STEP 4 Use the “outputRotateX” of the “l_wrist_qte” (qte variable – quatToEuler node) for your objective, it should be outputting only the twisting in the X axis.
STEP 5 Profit 😎
Tip: if you’re getting flips before 180 and everything is aligned properly, try changing the inputRotateOrder in the quatToEuler node to match your ctrls/jnts
Sometimes Maya camera gets corrupted and when you try to focus on objects it just goes really far away and usually this behavior persists on all scenes you open from there on.
A quick way that has worked for me to fix it is to first close all open Maya sessions, then find your userPrefs.mel file and search for this line:
-fv "defaultFitFactor" 0
Just change the value to 1 and it should fix your issue.
If you don’t want to edit the file directly you can run the following MEL command inside Maya:
optionVar -fv "defaultFitFactor" 1;
Or the alternative Python command:
from maya import cmds
cmds.optionVar( fv=('defaultFitFactor', 1) )
When applying any of these fixes make sure there is only the current Maya session running or you might overwrite the fix by closing a Maya session that still has the old value set.
Alright let’s kickstart this blog with something really simple and fast 🙂
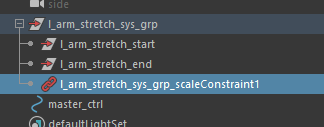
SO… when doing correctives, limb stretching or any kind of setup we need to be able to measure distances between points, right? I’m going to share how I’ve been doing it since forever. I’m actually proud of this one since it was one of the first “techniques” I discovered myself when I started rigging without being told or following tutorials.
STEP 1 You’re going to create 2 empty transforms (groups) and 1 distanceBetween node.
Name them however you want to make things clear. I usually name them: “(name of what I’m measuring)_start“ “(name of what I’m measuring)_end“
To create a distanceBetween node just write it on the node editor or use a command: createNode distanceBetween cmds.createNode( 'distanceBetween' )
STEP 2 Connect the .translate attributes of both groups into the distanceBetween .input attributes.
STEP 3 Select both transforms and hit Ctrl+G to group, rename it.
STEP 4 Do a scaleConstraint of the master/global/SRT control of your rig. You know, the one you use to move around and scale the entire character.
PROFIT And now were done! Do pointConstraints in the start and end transforms to whatever you’re trying to measure the distance. (for example to the elbow and wrist controllers)
Now you can safely use the distanceBetween.distance attribute to drive stretching or correctives as you need to. Since the parent group where both transforms are located is constrained to the master_ctrl space, the distance value will always be reliable and you don’t need to compensate anything when scaling, since the translate values will be the same. In another words, the scale constraint
That works even in non-uniform scaling… don’t believe me? Scale the master_ctrl using any combination of sx, sy, sz and track the value of the distanceBetween.distance. Just keep this setup as simple as possible in a separate location of the moveable rig and you should be safe. 🙂
I was looking back at my old blog using web.archive and felt very nostalgic, it was nice reading some things I wrote and remembering how it felt like to be young again 🙂
So I registered this WordPress website and hopefully I’ll be posting things that I find interesting in my 3d journey and perhaps some tutorials like old times? Probably silly stuff 🙂 it’s been a while and I learned a bunch, so it might be interesting.